
How to Create Gorgeous Alcohol Ink Art on Wood Panels
This post contains affiliate links, which means we may receive a small commission at no cost to you if you make a purchase.
Today I am going to show you how to how to create one of those gorgeous pieces of alcohol ink art on a wood panel. This is going to be a to the point, every thing you need to do, all the supplies you need, where you can find the best supplies at the best price, no frills tutorial. This is the format I most appreciate from others tutorials so lets get started.
Step 1
The first items you will need are Alcohol Ink, Yupo paper, 91% alcohol and wood panels. I order my Ink, paper, and panels from Blick Art Materials. I am linking what I use but there are choices to make for each item. I use primarily Ranger Inks but there are others available that perform well also. I prefer the tips on the bottles that Ranger produces. The Yupo paper I use is the bright white watercolor paper in 11″ x 14″, it comes in two other types, translucent and heavy duty. The panels come in various sizes and also various depths. I use a depth of 1 1/2″ because it can be hung or sit on a shelf, it just looks better than some of the thinner ones. You will also want to wear gloves, you will get ink on your hands and it isn’t easy to get it off.
A caution when using Alcohol Ink. Please use protection such as a respirator. The smell may not bother you but long term use can cause health problems.
Step 2
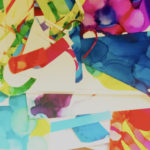
The next step is to create your art pieces, here’s where you get creative. For those of you who have used alcohol ink before, you can skip this part if you want. For those who haven’t, you simply drop some of that ink on your Yupo paper and then spread it out using a brush ( there are several different ones with cut outs in them. I have used many different items to spread the ink around use your imagination and experiment. You can also drop some alcohol onto the ink and blow it around with an embossing gun (mini heat gun), a straw or simply blow on it. You can drop some alcohol and tilt your paper and let it run. Using several colors can create some interesting effects. Make several different designs but in colors that will compliment each other once they are mounted.

Step 3
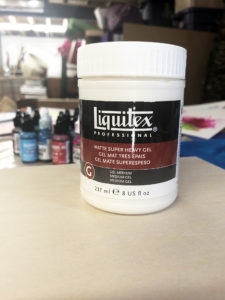
After your ink has dried you are ready to adhere a base to your wood panel. Decide what you would like to use for the base and trim it so that it is slightly larger than the panel. I purchased some scissors specifically for these items and don’t use them for anything else, kind of like your mother’s sewing scissors that you weren’t allowed to touch. Now you are ready to adhere your art piece to the panel. I use Liquitex Matte Premium Gel you can find it here. I have found that this works best, you want to spread a very thin layer on your wood panel. put your design on top and then use a brayer or plastic wallpaper smoother to get any air bubbles out. My brayer is ancient but they look like the picture below.
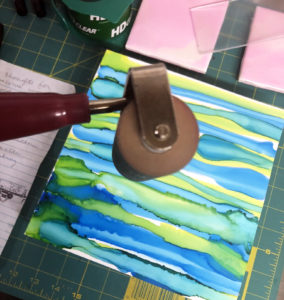
After you have anything in place you need to flip it upside down onto a flat surface on top of some freezer paper or wax paper between the surface and the wood panel. Then put some weight on it, books, magazines, hand weights, anything you have on hand. Let it sit overnight. The next day trim the edges of any any the paper that goes over the edge.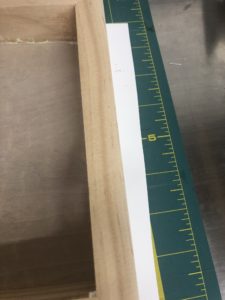
You are going to want to use a single edged razor blade or craft knife to remove the excess. This is what mine looked like after they were trimmed.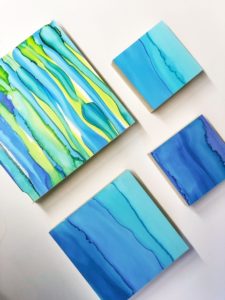
Step 4
The next step is to layer your panel with other pieces you have created with your alcohol ink. I have a box filled with scraps I can choose from. Cut them into any shape and then use spray adhesive to mount them to your board. Try not to do too much overlapping, I have found that if I do this my project will then require multiple layers of resin.
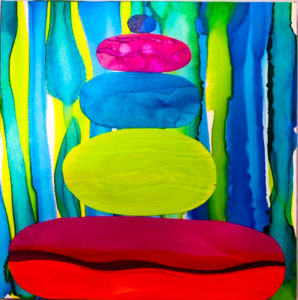
After this step mine looked like this
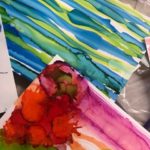
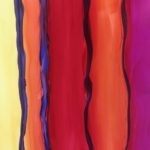
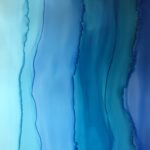
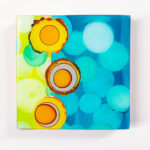
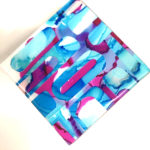
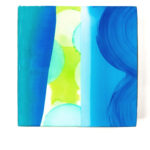
These are some others I have done
Flip them again on a flat surface at least for a few hours to make sure they are dry. At this point you are going to want to tape the edges. The best I have found is frog tape, press that tape really well around your edge
Step 5
Once this step is done I seal my panels. Alcohol Ink tends to fade when exposed to sunlight so this step will help to prevent that. The first step is to us Kamar Varnish by Krylon you can find it here or here, I have given you two options Blick and Amazon, at the time this was published Blick was a full dollar cheaper. Give it two to three light coats, then use UV-Resistant Clear by Krylon also you can find it here .

Two to three coats of this one also and when everything is dry (almost done) we can move onto resin.
Step 6
A caution when using resin. Please use protection when using resin, a mask or respirator. You may not be bothered by the odor and some brands you may not smell at all but long term unprotected use could cause harm. They are various types of resin on the market, the most popular is ArtResin, Be sure and read the instructions carefully and follow them. Resin calculators are also available online giving you the correct amount of resin to mix for your size wood panel. Not enough mixing time or not mixing the right quantities can ruin your project. Once you have mixed it for the instructed amount of time you are ready to pour it on your project.
Make sure your board it sitting level with plastic underneath. I set mine on top of a plastic cup that is sitting on plastic sheeting. Again make sure it is sitting level.

Then go ahead and pour your resin, let it set for a minute or two and use a torch to get rid of the air bubbles. There are a multitude of torches to choose from. I repeat this two or three times until I am sure that there are no more bubbles in it. Once you are confident that you have gotten them all you will want to cover your piece while it dries. Here’s a video on the process:
You could use a plastic container or use a plastic sheet to make a little tent. In 24 hours your resin will be dry enough to take the tape off (carefully) or apply another coat of resin which is what I prefer to do. If you do two coats of resin you will want to give your wood panel a light sanding between coats and be sure to remove all of the dust.
Once your panel is dry and you take the tape off you may have to clean up the sides a bit. You can sand them to keep the natural look, paint them or stain them.
I will update this post with more pictures as soon as my second coat has dried. Any questions or comments just ask them in the comments section.